As posted about below, we recently went on a trip to the Operation Christmas Child processing centre in Cambridge, Ontario. We went for two reasons: to take our boxes in person, as we missed the cut-off date for local drop-off centres, and also to see the insides of this wonderful operation!
When you drop off a box for OCC, they ask that you also donate some money to help cover shipping. We decided to raise our shipping funds by selling the books the kids made after our trip, about their tour around the centre. Our goals is to raise $30 to give to Operation Christmas Child to cover the shipping costs of the four boxes we put together. Here are the books!
Thank you for your support of my kids and Operation Christmas Child. :-)
Rocking around....the Operation Christmas Child Processing Centre
Tuesday, December 10, 2013
Posted by Les at 9:28 PM
Today we took a fabulous trip.
For many years now, we've packed shoeboxes for Operation Christmas Child, a ministry of Samaritans Purse. This year was no different.
What was different however, was that a few days before collection week, my husband suffered a pulmonary embolism. This pretty much threw the house into turmoil for over a week. There was no way I could get our boxes over to the usual drop-off site. Once things settled down, I started nosing about for a way to get our boxes delivered to the right place. I recalled talking to a woman at a Christmas party a few years ago about how she volunteered for OCC at their processing centre in Cambridge. A few calls and I discovered that we could indeed take our boxes there ourselves, and also have a tour around the facility. I jumped at the chance!
Our tour started down a hallway with a wall of donors to the cause. All these businesses donate various things needed to run the processing centre--items for incomplete boxes to coffee for the volunteers.
In a training room, large posters detailed what items were not allowed in boxes. We were disappointed to find out that chapstick, something we usually put in our boxes is not allowed. Our lovely guide Becky explained that it's too much like make-up and many countries consider that inappropriate for young girls--and it can also get them kidnapped for trafficking purposes. :-(
These articles taped up in the training room are stories of happy children receiving their boxes, and also an amazing story about a woman from Romania who received a box as a child. She moved to Canada as an adult and now helps OCC to continue to spread the blessings she received.
More pictures posted on a hallway wall of thrilled children opening their boxes.
I loved this picture...and the caption.
The Donation section. These boxes organize all the 'inappropriate' items and ready them to be sent to local charities that need such items. I love that nothing is wasted!
This is a shipment ready to be sent to Haiti. Each box you can see holds (I believe) 25 shoeboxes.
The odd-sized packing section. For non-standard sized shoeboxes.
Another shot of the Haiti shipment.
The processing line. These are the stations the volunteers man to check each box and make sure it's ready to ship.
The shoebox hospital....
...complete with ambulance. When a box has been overstuffed, has broken open, or needs extra items to fill it completely, it gets sent to the shoebox hospital where volunteers nurse it back to health. :-)
"Cured" boxes, heading back to the processing lines.
The volunteers came back from their break and we got to see them all get back into action.
The craft idea table, for groups and individuals who like to spend time during the year making items to go in boxes.
The cafeteria, where the volunteers have their lunch and snacks.
A map showing where Canada's boxes are going.
The tally board. Amazing!!
Information about another ministry arm of Samaritans Purse--water purification units for communities without potable water.
The OCC "Store", selling gently used items, and some OCC momentos ( t-shirts, ornaments--we brought one home for our tree to remember the day) to raise funds to buy items to fill sick or underfilled boxes.
Our wonderful tour guide Becky! She did a great job!
It was just such an invigorating and thrilling trip. I was really emotionally moved to see those huge stacks of boxes and hear some of the stories. I was discouraged this year to happen upon some articles and blogs criticizing OCC, and while it didn't cause my faith in this organization to waver, I did wonder about some of the points of contention I'd read about. I asked Becky about a few of the things I'd read: things like the problem of items going to children that couldn't use them--like winter hats to hot countries. She pointed out that even in hot countries, such items are still needed as their cooler seasons are to them, as our icy winters are to us! Or at night time in many of these countries, it still gets rather cold.
Most of all, I came away from our tour today more convinced than ever that God is using Operation Christmas Child. He's using them to bless children, and most importantly, lead many of them to Christ. One criticism I read was that OCC puts religious literature in the boxes, and parents of these children don't realize that they're sending their kid off to get a box and religious instruction will be a part of it. Becky assured me that OCC is granted permission to put the tracts, storybooks and other literature into the boxes. It's not foisted upon unsuspecting families. To be honest, this criticism did not bother me much; I'm afraid I see the issue of reaching children with the gospel as more important than a parent who may object. We're talking about their everlasting souls. I would face an irate parent over this issue any day rather than face the Lord someday and admit that I wimped out of sharing the gospel with a child in this way.
One final story that Becky told that really did me in....she talked of a town where a set of twins were waiting to receive their boxes. I think the strict rule is that a child has to be there in person to receive their box. The day of the distribution, one twin was sick and could not go get her box. Her sister went without her and returned home with a single box. When they opened it up....they found that there were two of everything in that box that had only been meant for one child. I was SO moved and amazed....God is present, even in these little details, there is no doubt.
I will never forget our trip to the Operation Christmas Child processing centre, and hopefully my kids won't either! Packing a box will never feel the same!
Ancaster Fair
Friday, October 11, 2013
Posted by Les at 6:19 PM
For the last few years, I've taken my kids to the Ancaster Fair. It's close by, and on one of the days it's free for homeschoolers. Good deal!
Last year as we went through the School Fair building, the kids oooh'd and ahhh'd over all the exhibits. Art work, posters, needlework, crafts of every kind. I could tell that my four were wishing they had entered something.
So this year we entered their mosaics. Honour also entered a small painting she had made and a ball of yarn she spun and dyed with her Grandma Kent this past summer. As well as her mosaic, Verity entered a baby hat she knitted with her hoop. Because Jairus and Afton only entered their mosaics, I hoped their pieces would do well.
All but Jairus' entry received a "Prize winning entry" ribbon, which I guess is fourth place. The lowest placing was a small sticker in the shape of a ribbon that said "Thanks for entering", so I was glad that they at least got the ribbons. Jairus' clock received 2nd place, which means he gets 3$ while the girls I believe get 1$ for each of their ribbons.
A satisfactory first showing in the Ancaster Fair School Fair. :-)
Last year as we went through the School Fair building, the kids oooh'd and ahhh'd over all the exhibits. Art work, posters, needlework, crafts of every kind. I could tell that my four were wishing they had entered something.
So this year we entered their mosaics. Honour also entered a small painting she had made and a ball of yarn she spun and dyed with her Grandma Kent this past summer. As well as her mosaic, Verity entered a baby hat she knitted with her hoop. Because Jairus and Afton only entered their mosaics, I hoped their pieces would do well.
A satisfactory first showing in the Ancaster Fair School Fair. :-)
Autumn Candles
Posted by Les at 6:04 PM
I'm not on Pinterest, and I refuse to be. However, I get daily emails from this lady (she's got a good thing going there) and a few weeks ago she had one of her homeschool Pinterest parties. I didn't "attend" but one picture did catch my eye, so I peeked at it, and followed the links to it's original home. I thought these mason jar candles were SO beautiful, and they seemed fairly simple to make: a good craft for the kids.
http://gingerbreadsnowflakes.com/node/102
So we went out gathering leaves and pressed them in a pad of paper. We let them dry there for two weeks, just as the instructions said.
Exactly two weeks later we opened up the notepad and each kid chose out a jar. We seemed to have amassed a collection of mason jars and other dollar store jars.
We set to work pasting the leaves onto the jars using Mod Podge I had picked up at Michaels. There was some frustration on most everyone's part trying to get the leaves to actually stick and stay on the jars. We found that the maple leaves seemed to stick down the best, while the oak leaves were quite thick and would only stick in the centre. With mason jars being square-ish, it was nearly impossible to stick leaves around the angles. We tried letting the Mod Podge dry a bit to become tacky, but it didn't make much of a difference. We ended up holding parts of the leaves against the jars, waiting for them to stay down.
Finally we managed to get the leaves mostly pasted on, and let them dry for a couple days. I think I'll hunt around for some ribbon to dress up the tops, instead of just putting the rings back on.
Discovery Centres! (AKA Lapbooks)
Friday, September 27, 2013
Posted by Les at 11:05 AM
A few years ago, at our local homeschooling convention (OCHEC) I attended a seminar on Lapbooks. Now, this was a concept I was almost completely ignorant about; I'm not even sure why I attended. I have a vague memory of watching this lady up at the front, sitting on a chair or stool with this folder...on her lap. Hence the name. :-)
At the time, honestly, I thought it was a little weird. Where did this idea come from? How did it evolve? Why was it something so fabulously wonderful that it prompted a whole seminar at the convention? After watching the presentation, I still thought they were a little weird, and I still didn't quite "get" them. Still, I filed the info away in my brain...and it resurfaced a few days ago.
I now think they are FABULOUS. SO fun. Such wonderful organized creativity in one little package. Love it. But I still think the name is weird. So in our house we renamed them Discovery Centres. The only problem is that the templates I find use the word Lapbook....oh well, no biggie.
Our first foray into Discovery Centres was a few days ago after a little field trip to the Chiefswood Historical Site, the home of the late E. Pauline Johnson. Since moving to this area early last year, I had driven past the site numerous times and thought it looked like a nice little place to visit and complement our Canadian history lessons. We scheduled our trip for a few days ago. We invited a couple other families who live close by, but schedules did not align, so off we went on our own. I love doing group trips, but I also enjoy getting out on our own, just me and my four. :-)
It was a very nice trip, with a very informative and gently speaking curator who managed to insert just enough questions throughout his presentation that my kids were kept engaged and interested. This is not the first old historical house we've been to (Laura Secord Home, The Gage house of Battlefield in Stoney Creek) but we found this one to be in particularly good shape, with lots of original artifacts, which just makes it all the more fascinating. I had prepped the kids the day before with some reading about E. Pauline Johnson off the internet. I find that having a base of knowledge makes all the difference on trips like this, as the kids instantly connect what they see with what they've learned about already, and this engages them all the more.
Usually after these kinds of trips, I try to have them all make a scrapbook page or two. This is fun, but I was inspired to try the Discovery Centres. Verity actually got me thinking about it, as a few days ago she and Afton were spending all their free time catching grasshoppers and crickets. Wanting to take advantage of this natural interest to promote some further learning and skill practice, I found a lapbook unit (free!) on grasshoppers. (links later). Verity started putting it together, but then our trip day arrived, so she's not completed it.
I decided they would need a demo to see, in living colour, before attempting to make our own DC's. So I perused the list of units and downloaded one about honeybees. Fascinating! I learned some facts myself! Here is my demo:
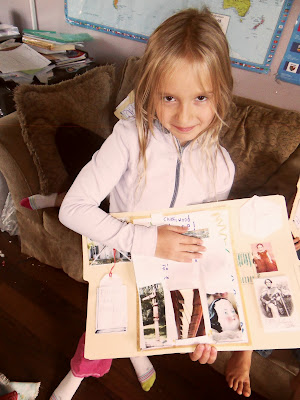
I asked them to pick which thing inside the DC they liked the best...Jairus chose the fold out picture puzzle. On the outside of the flaps we pasted a picture of the Chiefswood house and when it opens up; a picture of the antique piano we saw there. Each kid picked a different picture to go 'inside the house'.
Verity chose to show her 'matchbooks'. Simple paper folders with a tab to tuck in, like a matchbook. We posted various pictures inside and they wrote some info about the picture on the inside of the flap.
Honour likes both her matchbooks and a mini tabbed folder. It served as the title, with a labeled picture of Chiefswood on the front, and it opened downward to reveal information about the house and its' inhabitants.
Afton couldn't decide on her favourite. Here she is showing the tri-fold booklet that explains E. Pauline Johnsons heritage (Mohawk and British), with pictures of her parents and Pauline in Native and British garb.
She also liked her mini tabbed folder and matchbooks.
My favourite, which no one demonstrated, was the 6 petal flower (you can see it in the top right of Afton and Honours, bottom right of Jairus and Verity's). It folds out to show icons on each petal of the Six Nations. We made a stop at the tourism centre across the road after the House and learned a little more about this community that we live so close to.
The beauty of these Discovery Centres is that all the work has been done for us! The grasshopper and honeybee units I found here. All the templates that we adapted for the Chiefswood DC's were found here. It's like a treasure trove of awesome resources to make these very fun learning resources. We'll be making lots more of these!
At the time, honestly, I thought it was a little weird. Where did this idea come from? How did it evolve? Why was it something so fabulously wonderful that it prompted a whole seminar at the convention? After watching the presentation, I still thought they were a little weird, and I still didn't quite "get" them. Still, I filed the info away in my brain...and it resurfaced a few days ago.
I now think they are FABULOUS. SO fun. Such wonderful organized creativity in one little package. Love it. But I still think the name is weird. So in our house we renamed them Discovery Centres. The only problem is that the templates I find use the word Lapbook....oh well, no biggie.
Our first foray into Discovery Centres was a few days ago after a little field trip to the Chiefswood Historical Site, the home of the late E. Pauline Johnson. Since moving to this area early last year, I had driven past the site numerous times and thought it looked like a nice little place to visit and complement our Canadian history lessons. We scheduled our trip for a few days ago. We invited a couple other families who live close by, but schedules did not align, so off we went on our own. I love doing group trips, but I also enjoy getting out on our own, just me and my four. :-)
It was a very nice trip, with a very informative and gently speaking curator who managed to insert just enough questions throughout his presentation that my kids were kept engaged and interested. This is not the first old historical house we've been to (Laura Secord Home, The Gage house of Battlefield in Stoney Creek) but we found this one to be in particularly good shape, with lots of original artifacts, which just makes it all the more fascinating. I had prepped the kids the day before with some reading about E. Pauline Johnson off the internet. I find that having a base of knowledge makes all the difference on trips like this, as the kids instantly connect what they see with what they've learned about already, and this engages them all the more.
Usually after these kinds of trips, I try to have them all make a scrapbook page or two. This is fun, but I was inspired to try the Discovery Centres. Verity actually got me thinking about it, as a few days ago she and Afton were spending all their free time catching grasshoppers and crickets. Wanting to take advantage of this natural interest to promote some further learning and skill practice, I found a lapbook unit (free!) on grasshoppers. (links later). Verity started putting it together, but then our trip day arrived, so she's not completed it.
I decided they would need a demo to see, in living colour, before attempting to make our own DC's. So I perused the list of units and downloaded one about honeybees. Fascinating! I learned some facts myself! Here is my demo:
In a nutshell, two (or more, if you like) file folders are refolded and pasted together to form this unit. Inside, are all kinds of mini books, flaps to open, cards to pull out, cute pictures and fold out 'centres' of information. A bonanza of easily accessible info for your visual learner! (Verity found this totally overwhelming, lol).
I decided to start a little simpler for the kids and their Chiefswood Visit Discovery Centres, so they just used one file folder. Behold!
The beauty of these Discovery Centres is that all the work has been done for us! The grasshopper and honeybee units I found here. All the templates that we adapted for the Chiefswood DC's were found here. It's like a treasure trove of awesome resources to make these very fun learning resources. We'll be making lots more of these!
A new venture
Friday, August 16, 2013
Posted by Les at 2:32 PM
Of all the experiences of the world, horseback riding is right up there with pottery making for me. I've tried it, back in my early teens, pretended to like it and haven't gone near a horse (or a pot) since. (Ok, I think James took me for a carriage ride in Chicago one year).(and I don't mind painting pots, just throwing them).
However, the horseback riding gene must have slipped through to my daughter, likely through James' mom. When we first started making our trips out to 'the property', Verity spotted the many farms along the way, some with horses in the fields and asked if she could take horseback riding lessons. I gamely said sure, not realizing a) what our finances were going to look like after moving (a mess) nor how much such a venture would cost. Needless to say, I put her off for more than a year after getting into the house.
Finally though, I felt I had to follow through on my word, however hastily spoken. I devised a plan whereby the grandparents would help out with the cost of some lessons for her birthday. The plan came together nicely and Verity excitedly headed off to a month of weekly hour and a half lessons at an extremely impressive facility about a 1/2 hour away, just west of Brantford. (Burford to be exact). I was pleased at the advantage homeschooling offered again, as we could have our pick of daytime slots.
She LOVED it. I didn't think this kid could take to something as easily and enthusiastically as gymnastics, but she did really well with it. I puffed a little with pride when after nearly every lesson, the teacher raved about how quickly and easily she was picking it all up, and how accurately she was remembering all the previous lessons.
Here she is learning how to care for the horse.
And up she goes!
Doesn't she look like a pro!? (Sorry, didn't mean to gush...can't help it!)
Verity and 'Pearl'.
She loved the lessons so much that of course, she asked to continue. 12 hours of gymnastics a week, plus the finance aspect of both that and further horseback lessons pretty much forced us to have to say no. But, hating to disappoint her so, James and I decided that we would take advantage of one of her summer training vacation weeks from the gym, and scrape together enough to send her for day long horse camp in August. She's already gearing up! So excited!
Pompeii's got nuthin' on us
Posted by Les at 1:48 PM
Art is a subject that I like very much, enjoyed immensely in school, was passable at, but so far have not done alot with in our homeschool. My girls are fairly naturally creative and enjoy a basket of craft materials as a gift. Verity seems especially drawn to sewing, knitting and other yarn/wool crafts while Honour is more likely to be creating something with paper and markers. She's a good little draw-er, she is.
Both the big girls have been out to some art classes a few years ago that I was quite pleased with, but they were in Grimsby, were not held on a regular schedule (just a term of 8 or so weeks) and they were not convenient to get over to.
Then this past spring we signed up for an outdoor drawing class. We joined a couple other homeschooling families and trooped along the edge of the escarpment in Dundas, drawing and doodling, noodling and sketching, as the teacher directed.
Partway through this class, I saw an email come through the homeschool list about an art fest and my interest was piqued. I forwarded the email to Honour and she was interested too. So I signed them up. We had a good couple of months to create our pieces for the festival and so I kept my mind open to ideas.
Shortly after, Verity's reader was about Pompeii. She became (rather eerily) interested in all of those casts of dead people; I was more interested in the mosaics. As well, we'd run across mosaics in our history studies of ancient times. Wouldn't mosaics be fascinating to learn and impressive to take to the fest?
We started off with a good ol' fashioned trip to the library and took a BOOK (yes, no Google involved!) out on our subject. It was a rather good book, with lots of explanations and definitions of terms, etc. It showed lovely pictures of simple projects. We did break out the Google at one point when the book referred to a man in France who had mosaicked his entire house; actually his estate. Everything from his headboard to the dog house--covered in mosaics!
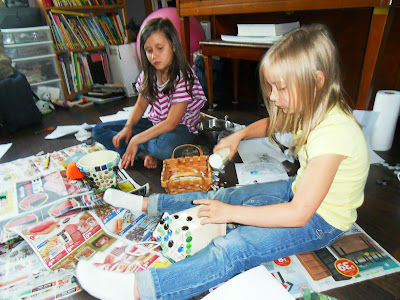
Next we gathered our materials, after deciding which project each kid wanted to do. Jairus wanted to do the clock face, Honour a plant pot, Verity a birdhouse and Afton a serving tray. I found the bases, tools, grout, adhesive and 'smalti' at Michaels, Home Hardware and Dollarama.
Then, some planning on paper.
Some projects needed prepping, like Aftons tray needed to be painted white. The others needed a coat of sealant to roughen them up and prepare the surface to receive the smalti and adhesive. We used real mosaic adhesive as well as some thicker silicone for the vertical projects. Then, the mosaicking began.
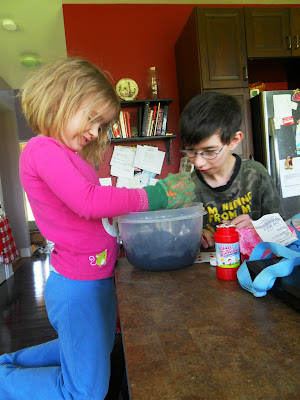
Next came the grout.
It was a little scary to glop that grout over the whole thing, but once we started wiping...
The beauty began to shine through!
They were all very pleased with how the projects turned out, and our display at the festival was well received. The mosaics are now sitting in a place of honour on a shelf in our great room. What a great experience!
Subscribe to:
Posts (Atom)